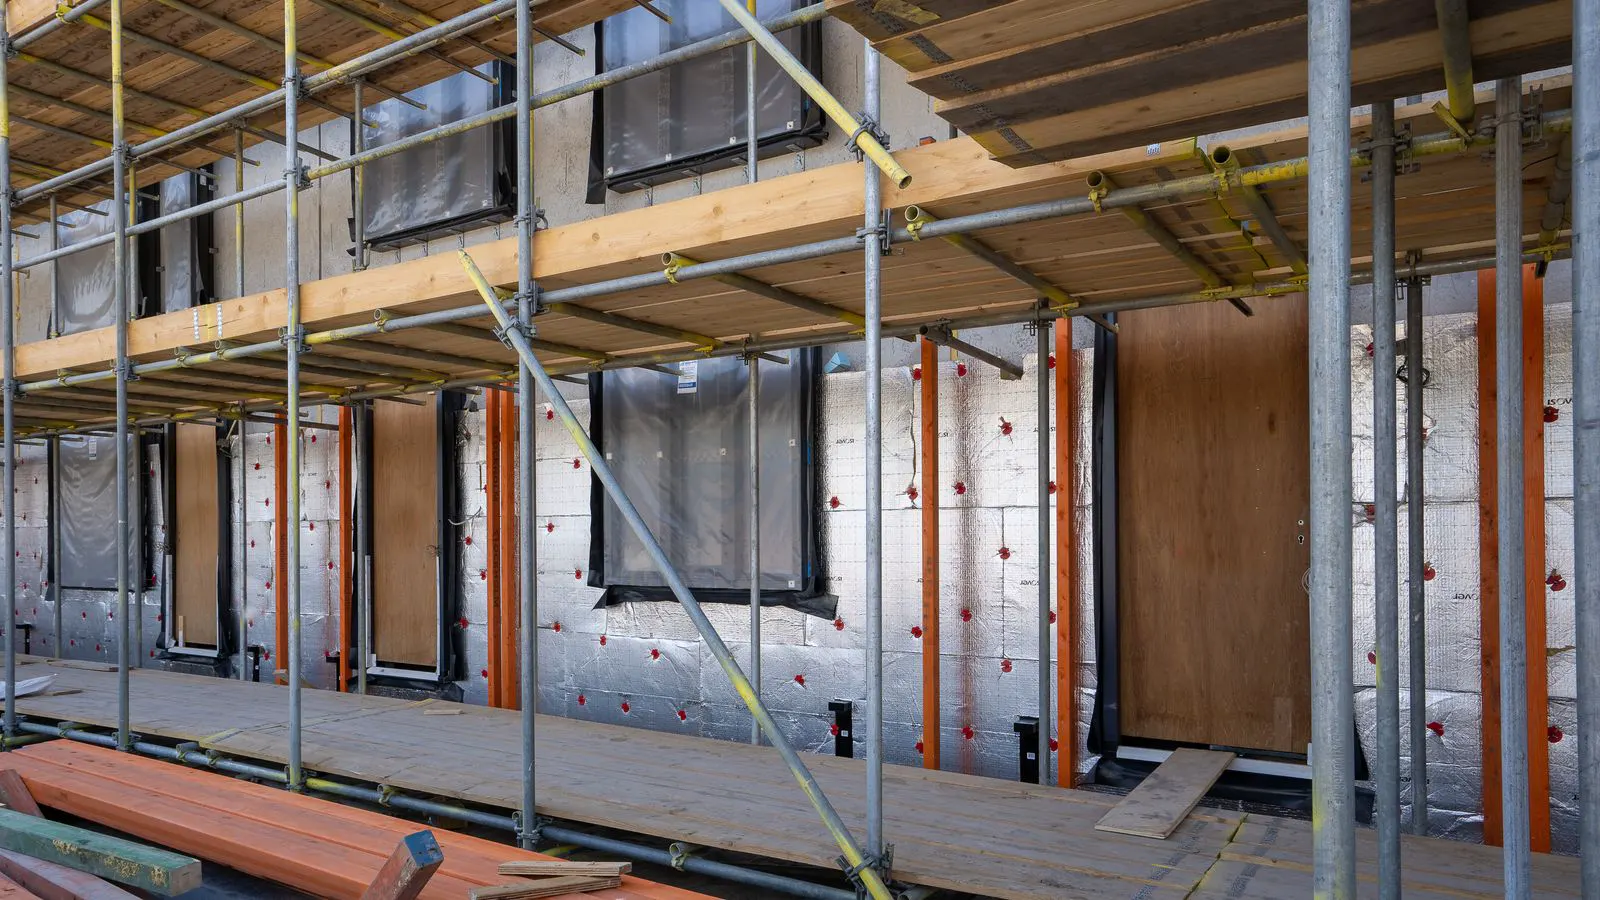
Engineers can fix prefab wall moisture by checking the air barrier, verifying insulation continuity, and controlling temperature differences. A structured inspection of the wall cavity and cladding system isolates the failure point. Correcting these elements stops condensation before it damages the structure.
- Inspect the air barrier before replacing insulation, as air movement is the primary driver of condensation.
- Check cladding joints and service penetrations for gaps that allow wet air into the wall cavity.
- Use a thermal camera and moisture meter together to map cold spots and damp zones accurately.
- Fix ventilation and temperature differentials to reduce the driving force for interstitial moisture.
- Document all findings and repairs to track long-term performance of the modular assembly.
Understanding the Failure Mechanism
Moisture in a prefab wall assembly rarely appears as a single leak. It usually enters through hidden pathways and settles where temperatures drop below the dew point. The wall itself acts as a passive heat exchanger. When warm, humid air from the interior meets a cold surface, it releases water vapor.
The location of the condensation reveals the fault. If dampness appears on the interior face, the air barrier is likely compromised or the insulation layer is thin. If it appears on the exterior, the cladding system is failing to shed water or allow drying.
Engineers must treat the wall as a three-part system. The cladding protects against rain. The insulation manages thermal flow. The air barrier stops convective moisture transfer. A failure in any one layer changes the behavior of the others.
Common Symptoms in Field Inspections
Field teams need a quick reference to match what they see with what is likely happening inside the wall. The table below lists typical symptoms found during routine audits of modular structures.
| Symptom | Likely cause | What to do |
|---|---|---|
| Interior wall staining near floor level | Rising damp or capillary action from a ground connection | Check the floor-to-wall junction. Install or repair a vapor retarder and improve floor ventilation. |
| Localized dark patches on the interior cladding | Air leakage at window frames or service penetrations | Seal gaps around frames with appropriate sealant. Verify the air barrier continuity at these joints. |
| Musty odor in the wall cavity | Insulation saturation or fungal growth | Remove saturated insulation. Dry the cavity. Identify and fix the source of the air intrusion. |
| Exterior cladding bulging or swelling | Trapped moisture behind the rainscreen | Lift the cladding. Inspect the weatherproofing membrane. Allow the assembly to dry before re-cladding. |
| Cold spots detected by thermal imaging | Broken insulation or air pockets | Access the cavity if possible. Patch the gap with compatible insulation. Re-seal the air barrier. |
These symptoms often appear together. A cold spot from poor insulation can create the temperature drop needed for condensation to form. The resulting moisture then degrades the thermal performance further. This creates a feedback loop that accelerates decay.
Diagnosing the Air Barrier
The air barrier is the most common point of failure in modular wall systems. It is a thin layer that must remain continuous across the entire wall assembly. In factory conditions, it is easy to apply. On site, it becomes difficult to maintain.
Check the perimeter of the wall. Look for gaps at the corners where two wall panels meet. These joints are high stress points. If the air barrier was cut to fit the panel edge, the seal may have failed.
Inspect all service penetrations. Cables, pipes, and ducts pass through the wall to serve the building. Each hole is a potential leak. Standard practice requires sealing these with fire-stopping or air-sealing materials. If you see bare insulation around a pipe, the air barrier is broken.
Window openings are another critical area. The gap between the window frame and the structural frame must be filled. If the installer used loose foam, it may have shrunk. If they used a tape joint, it may have peeled. Both allow air to move freely.
A simple smoke test can help identify hidden leaks. A technician holds a smoke pencil at the interior face of the wall. If smoke appears at the exterior, or if you see smoke being pulled out of a small gap, you have found a breach.
Insulation Continuity and Thermal Bridging
Insulation is not just a block of material. It is a continuous layer that must cover the entire interior face of the structural frame. Gaps between studs or around beams create thermal bridges. Heat flows along these bridges to the exterior. The metal or wood structure becomes a cold path.
When warm interior air reaches this cold path, it condenses. This is different from surface condensation. It happens inside the material. The structural member becomes damp, which lowers its thermal resistance and accelerates the cycle.
In prefabricated walls, the insulation is often installed in the factory. This is an advantage. The factory provides controlled conditions. However, if the insulation is cut to fit around electrical boxes, the cut may not align with the stud face. A small gap here becomes a thermal bridge.
Check the top and bottom plates. These are often the weakest points. The insulation must extend to the structural edge. If it stops short, the plate becomes a cold spot. The condensation then forms on the plate itself, not in the cavity.
Controlling the Cladding System
The exterior cladding does not need to be a perfect air barrier. Its job is to shed water and allow the wall to dry. However, if the cladding fails, it brings rainwater into the wall cavity.
Rainwater is different from condensation. It enters through the outside. If the cladding has a gap, rain enters. If the wall is airtight, the water has nowhere to go. It sits in the cavity and rots the sheathing.
Check the flashing details. Flashing is metal or membrane material that directs water around corners and penetrations. If the flashing is missing or loose, water will run behind the cladding.
Look at the vents. Some prefab wall systems use a ventilated rainscreen. This space allows moisture to escape. If the vents are blocked by debris or paint, the cavity stays wet. Clear the vents and ensure the drainage path is open.
Prevention and Long-Term Monitoring
Prevention is cheaper than repair. It starts with the design phase. The wall assembly must be detailed with the air barrier and insulation as continuous elements. The cladding must be specified to allow drying.
During construction, inspectors should check the air barrier at every stage. Do not wait until the cladding is up. The air barrier is hidden behind it. Once the cladding is installed, you cannot see the gaps.
After the building is occupied, monitor the wall. Use a simple checklist. Check for stains after heavy rain. Check for musty odors in spring and fall. These are seasonal changes in humidity and temperature.
Keep records. If you fix a leak, note the location and the material used. If you replace insulation, note the type and the date. This history helps you predict future issues. If a certain area of the wall always gets damp, it needs a specific fix.
When to Call a Specialist
Some moisture problems are too complex for a general contractor. If the wall has been damp for a long time, the materials may be degraded. Wood may be soft. Metal may be corroded.
If you find mold on the structural frame, stop work. Do not paint over it. Do not seal the area. A specialist needs to assess the extent of the damage. They may need to remove sections of the wall to inspect the frame.
Also call a specialist if the building has a history of condensation. It may be a design flaw. The wall assembly may have been specified with too much insulation on the wrong side. The air barrier may be in the wrong location. Changing this requires a full redesign of the wall section.
A specialist can run a dew point calculation. They measure the indoor temperature and humidity. They measure the outdoor temperature. They calculate where in the wall the dew point will be. If the dew point falls inside the insulation, the wall is defective.
Final Checks for the Site Team
Before you sign off on a prefab wall, run through this list.
- Verify the air barrier tape is continuous around all joints and penetrations.
- Check that the insulation fills the cavity completely without gaps at the top and bottom plates.
- Inspect the cladding flashings to ensure they are watertight and correctly installed.
- Confirm that any ventilated rainscreen system has clear, unobstructed vents.
- Test the wall for air leakage using a smoke pencil or blower door test if available.
- Check the interior finish for any signs of staining or peeling paint near the floor and ceiling.
If you pass these checks, the wall is ready for service. If you fail any, document the issue and return for repair before the next phase of construction begins.
Frequently asked questions
How do I know if the moisture is coming from inside or outside?
Check the temperature of the affected area. If it feels cold to the touch, it is likely condensation from the inside. If it feels wet and cold after rain, it is likely leakage from the outside.
Can I just paint over a damp wall to stop it from getting worse?
No. Paint is a surface finish. It does not stop air or water from entering the wall. If you paint over moisture, the wall will continue to rot behind the paint.
What is the best material for sealing a gap in the air barrier?
Use a high-quality tape or sealant designed for the specific material of the wall. For wood frames, use a flexible sealant. For metal frames, use a sealant that adheres to metal and remains flexible in temperature changes.
Is it normal for a prefab wall to feel cold near the floor?
It is not normal if the wall is properly insulated. A cold spot near the floor usually indicates a gap in the insulation at the bottom plate or a failure in the air barrier at the floor junction.
How often should I inspect the air barrier?
Inspect it during construction and again after the building has been occupied for one year. Then, inspect it every three to five years or after any major repair to the wall.